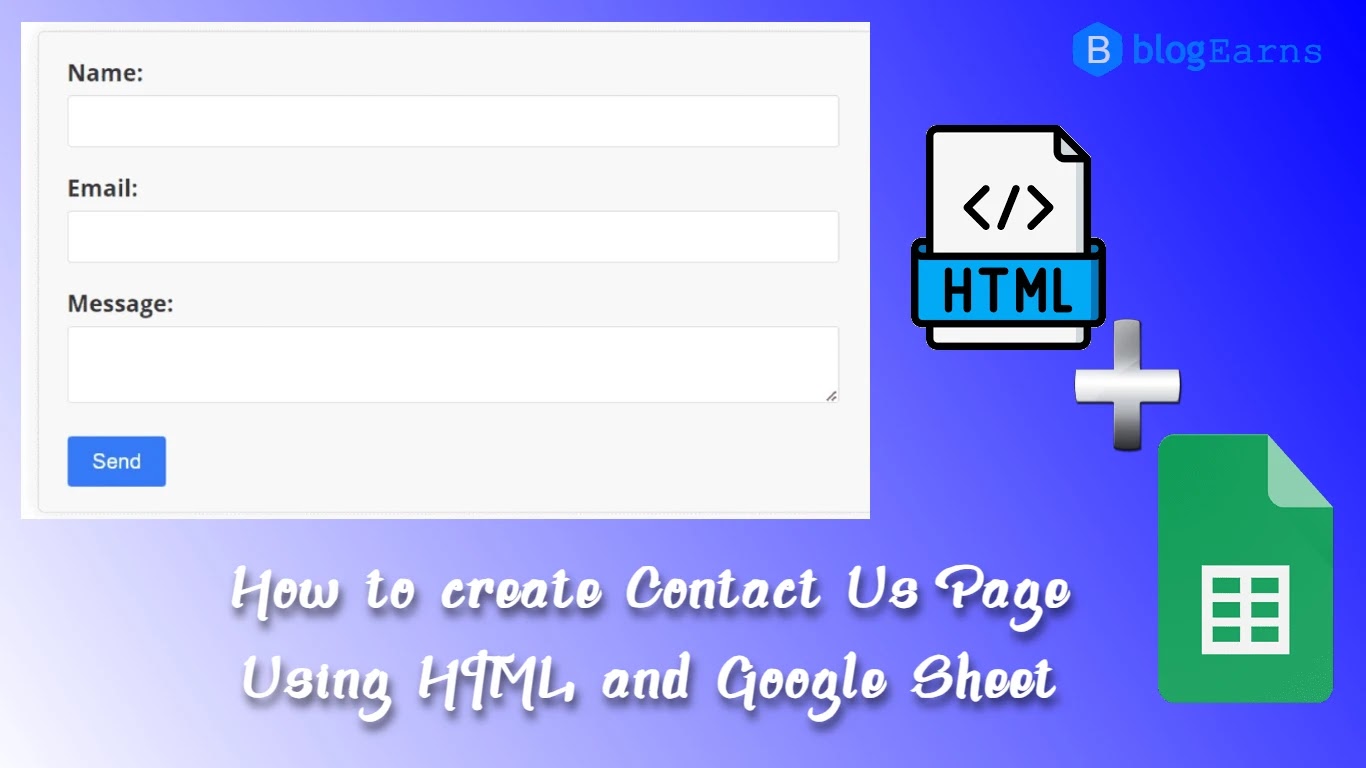
How to create a Contact Us page using HTML and Google Sheet
Creating a Contact Us page is an essential part of any website. It provides a means for users to reach out to you, whether it’s to ask a question, business inquiry, request assistance, or provide feedback. In this blog post, we will guide you through the process of creating a Contact Us page using HTML and Google Sheets.
Why a Contact Us Page is Important
Before we delve into the technical details, let’s first understand the importance of having a Contact Us page on your website. A Contact Us page serves as a direct line of communication between you and your users. It not only helps in building trust and credibility but also demonstrates that you value and prioritize customer feedback.
By providing a Contact Us page, you enable your website visitors to easily reach out to you, which can lead to valuable insights and opportunities for engagement. It also helps in resolving customer issues promptly, leading to improved customer satisfaction.
This is a dynamic Contact Us page. In this, you will have a contact form with fields like name, email, textarea, and a send button. If you want to create a static Contact Us page with your email, and contact number written on board, you can use our Contact Us page generator.
Creating a Contact Us Page with HTML
Now that we understand the significance of a Contact Us page, let’s explore the steps to create one using HTML.
1. Start with the HTML form tag
To create a Contact Us page, you need to begin with the HTML form tag. This tag acts as a container for all the form elements that will be included in your Contact Us page.
<form id="submit-to-google-sheet" name="submit-to-google-sheet">
    <label for="name">Name:</label>
    <input type="text" id="name-sn-1" name="name" required><br>
    <label for="email">Email:</label>
    <input type="email" id="email-sn" name="email" required><br>
    <label for="message">Message:</label>
    <textarea cols="25" id="message-sn" name="message" required></textarea><br>
    <button id="submit-button-sn" type="submit" value="Send">Send</button>
</form>

<div id="sending-message" style="display: none;">Please wait, Your message is being sent...</div>
<div id="success-message" style="display: none;">Your message has been sent. Thank you!</div>
2. Style the form using CSS
After creating the HTML structure, you can enhance the appearance of the Contact Us form using CSS to match your website’s design and branding.
<style>#submit-to-google-sheet{ width: auto; max-width: 600px; margin: 0 auto; padding: 20px 50px 20px 23px; background-color: #f8f8f8; border: 1px solid #ddd; border-radius: 5px; box-shadow: 0px 0px 15px rgba(0, 0, 0, 0.1); transition: all 0.3s ease;} #submit-to-google-sheet:hover{ box-shadow: 0px 0px 20px rgba(0, 0, 0, 0.15);} #submit-to-google-sheet label{ display: block; margin-bottom: 5px; font-weight: bold; color: #333; font-size: 1.1em;} #submit-to-google-sheet input, #submit-to-google-sheet textarea{ width: 100%; padding: 10px; margin-bottom: 20px; border: 1px solid #ddd; border-radius: 3px; font-size: 1em; transition: border 0.3s ease;} #submit-to-google-sheet input:focus, #submit-to-google-sheet textarea:focus{ border-color: #007BFF; outline: none;} #submit-to-google-sheet button{ padding: 10px 20px; background-color: #007BFF; color: #fff; border: none; border-radius: 3px; cursor: pointer; font-size: 1em; transition: background-color 0.3s ease;} #submit-to-google-sheet button:hover{ background-color: #0056b3;} #sending-message, #success-message{ padding: 10px; border-radius: 3px; margin-bottom: 20px; transition: all 0.3s ease;} #sending-message{ background-color: #ffcc00; color: #333;} #success-message{ background-color: #28a745; color: #fff;} @media (max-width: 600px){ #submit-to-google-sheet{ box-shadow: none; border: none;} #submit-to-google-sheet label{ font-size: 0.9em;} #submit-to-google-sheet input, #submit-to-google-sheet textarea{ font-size: 0.8em;} #submit-to-google-sheet button{ font-size: 0.8em;}} </style>Managing Contact Form Submissions with Google Sheets
Now that you have successfully created the contact form page using HTML, you need a way to handle and store the form submissions. Google Sheets provides a simple and effective solution for managing contact form data.
1. Create a Google Sheet
Start by creating a new Google Sheet or use an existing one where you want to store the contact form submissions. Here’s how:
- Go to Google Sheets (https://docs.google.com/spreadsheets/).
- Click on “+ Blank spreadsheet” to create a new document.
- Name the spreadsheet something like “Contact Form Email”.
Writing the Google Apps Script
Following that, you will create a Google Apps Script to manage form submissions. When a user submits the form on your “Contact Us” page, this script is invoked.
Follow the below steps to create the script:
-
- From your Google Sheets document, click on “Extensions” > “Apps Script”.
- Delete any code in the script editor and replace it with the following:
function doPost(e) {
    var params = e.parameter;
    var name = params.name;
    var email = params.email;
    var message = params.message;

    // Get current date and time
    var now = new Date();
    var timestamp = Utilities.formatDate(now, "IST", "yyyy-MM-dd HH:mm:ss");

    // Store data in Google Sheet
    var sheet = SpreadsheetApp.getActiveSpreadsheet().getActiveSheet();
    sheet.appendRow([timestamp, name, email, message]);

    // Send email - Comment out lines below to send email
    // var emailBody = 'You received a new message from ' + name + ' (' + email + ') at ' + timestamp + ':nn' + message;
    // MailApp.sendEmail({
    //   to: 'Provide_YOUR_EMAIL_ADDRESS',
    //   subject: 'New message',
    //   body: emailBody,
    // });

    return ContentService.createTextOutput(JSON.stringify({ 'result': 'success' })).setMimeType(ContentService.MimeType.JSON);
}- Click on “File” > “Save” and name your project something like “Contact Form Script”.
Setting Up a Trigger
- Click on the clock icon from the Apps Script editor, which represents “Triggers”. This will open the “Project triggers” page.
- Click on “+ Add Trigger” at the bottom right of the page.
- Under “Choose which function to run”, select doPost from the dropdown menu.
- Under “Select event type”, choose “On form submit”.
- Click “Save”.
You’ll be requested to sign in with your Google account to approve the script. This is required since the script requires access to your Google Sheets document and to send emails on your behalf.
Follow the below steps to authorize the script
- A dialog box will appear saying, “Authorization required”. Click “Review Permissions”.
- Choose your Google account.
- A message will pop up on your computer screen: “This app isn’t verified”. Click “Advanced” and then “Go to Project Name (unsafe)”.
- Click “Allow” to give the script the necessary permissions.
Now, whenever a user submits the form on your “Contact Us” page, the doPost function will be triggered, and the user’s message will be stored in your Google Sheets document.
After setting up the trigger and authorizing the script, you can proceed to deploy the script as a web app, as described in the previous message.
Deploy the Script as a Web App
Finally, you’ll deploy your script as a web app. This will generate a URL that you can use to execute the script.
Here’s how to put the script to use:
- Step 1: From the Apps Script editor, click on “Publish” > “Deploy as web app”.
- Step 2: Under “Project version”, select “New” and write a version description like “Initial version”.
- Step 3: Under “Execute the app as”, select “Me (your email)”.
- Step 4: Under “Who has access to the app”, select “Anyone, even anonymous”. This allows users who aren’t logged into a Google account to submit the form.
- Step 5: Click “Deploy”.
- Step 6: You’ll see a message saying “Authorization required”. Click “Review Permissions”, select your account, and grant the necessary permissions.
- Step 7: You’ll then see a message saying “This app isn’t verified”. Click “Advanced” and then “Go to Contact Form Script (unsafe)”.
- Step 8: Click “Allow” to grant the necessary permissions.
- Step 9: You’ll then see a dialog box with the URL of your web app. Copy this URL and save it somewhere – you’ll need it in the next step.
That’s it! You’ve now configured Google Sheets and Google Apps Script to handle form submissions from your “Contact Us” page.
Connect the HTML FORM to Google Sheet
Finally, we’ll use JavaScript to connect our HTML form to Google Sheets. When the form is submitted, we’ll send a POST request to our Apps Script web app, which will then store the data in Google Sheets. Here’s the JavaScript code:
<script>
    var scriptURL = 'https://script.google.com/macros/s/YOUR_SCRIPT_ID/exec'
    var form = document.forms['submit-to-google-sheet']
    var successMessage = document.getElementById('success-message');
    var sendingMessage = document.getElementById('sending-message');

    form.addEventListener('submit', function(e) {
        e.preventDefault()
        form.style.display = 'none'; // hide the form immediately
        sendingMessage.style.display = 'block'; // show the sending message
        fetch(scriptURL, { method: 'POST', body: new FormData(form) })
            .then(function(response) {
                console.log('Success!', response)
                sendingMessage.style.display = 'none'; // hide the sending message
                successMessage.style.display = 'block'; // show the success message
            })
            .catch(function(error) {
                console.error('Error!', error.message)
                form.style.display = 'block'; // show the form again in case of error
                sendingMessage.style.display = 'none'; // hide the sending message
            })
    })
</script>
That’s all there is to it! You now have a “Contact Us” page that collects user messages and directs them to a Google Sheet. Have fun coding!
Please note that https://script.google.com/macros/s/YOUR_SCRIPT_ID/exec must be replaced with the URL of your own Apps Script web app.
Conclusion
Creating a Contact Us page using HTML and Google Sheets is a straightforward process that ensures effective communication between you and your website visitors. By following the steps outlined in this blog post, you can easily set up a Contact Us page and manage form submissions seamlessly.
Remember, a well-designed Contact Us page not only facilitates communication but also helps in building trust and strengthening customer relationships. So, don’t underestimate its importance, and start creating yours today!
Have you ever faced any challenges while setting up a Contact Us page? Let us know in the comments below. We’d be happy to help you out!


backlinks check https://www.blogearns.com/
Hello there, just became alert to your blog through
Google, and found that it’s truly informative. I’m gonna watch out for brussels.
I’ll appreciate if you continue this in future. Lots of people will be benefited from your
writing. Cheers!
Your style is really unique compared to other people I have read stuff from. Thanks for posting when you have the opportunity, Guess I will just book mark this blog.
I do trust all of the ideas you’ve introduced in your post.
They’re really convincing and can definitely work. Still, the posts are very
brief for starters. May you please lengthen them a bit from subsequent time?
Thanks for the post.
Pretty! This was a really wonderful post. Thanks for supplying this info.
It’s appropriate time to make a few plans for the long run and it is time to be happy. I have read this publish and if I could I wish to recommend you few attention-grabbing things or advice. Maybe you could write subsequent articles referring to this article. I wish to learn more issues approximately it!
I always was interested in this subject and still am, thankyou for posting.
Thank you for your sharing. I am worried that I lack creative ideas. It is your article that makes me full of hope. Thank you. But, I have a question, can you help me?